Okay, confession time. Remember that time I tried to draw a realistic apple with colored pencils and it looked like a… well, let's just say it looked like something that had been run over by a truck? Yeah, that was me. I was so frustrated! I thought, "Colored pencils are for kids!" But then I saw some amazing art online, all done with colored pencils, and I thought, "Okay, maybe I need to up my game." So, I dove headfirst into learning all the techniques. And guess what? It's actually pretty fun!
So, let's talk about colored pencil techniques. Forget about scribbling! We're aiming for something a little more… sophisticated. (Though, honestly, scribbling has its place sometimes, too. We're not judging here.)
Essential Colored Pencil Techniques
These are the basics, the building blocks of colored pencil awesomeness. Get these down, and you'll be creating masterpieces (or at least, slightly less truck-run-over-apple-esque drawings) in no time.
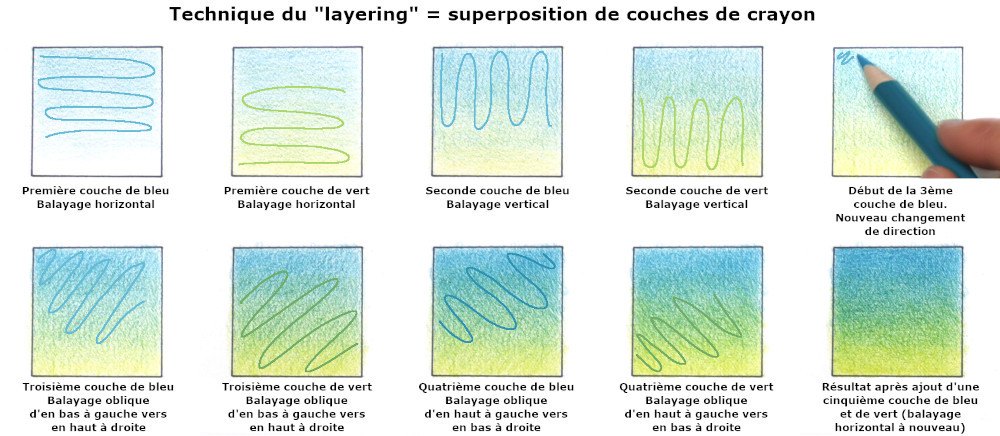
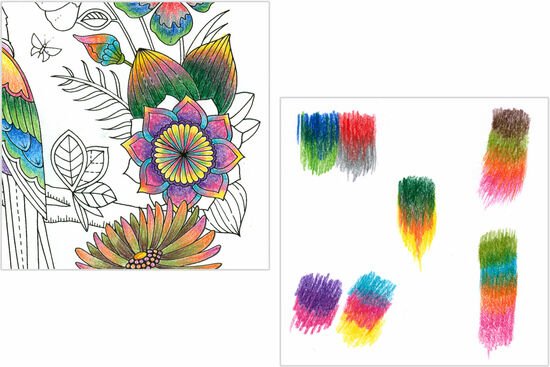
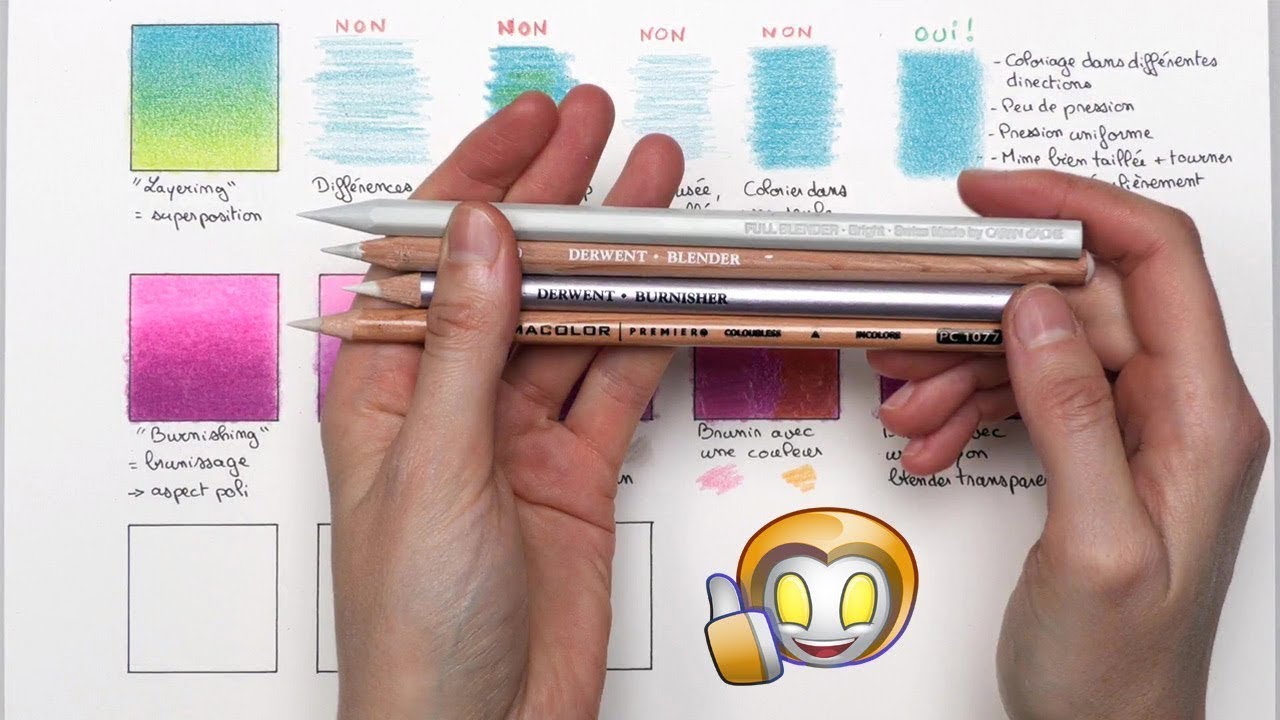
- Layering: This is key. Don't try to get the perfect color in one go. Build it up gradually with thin layers. Think of it like applying makeup... oh wait, bad analogy? Anyway, build it up slowly!
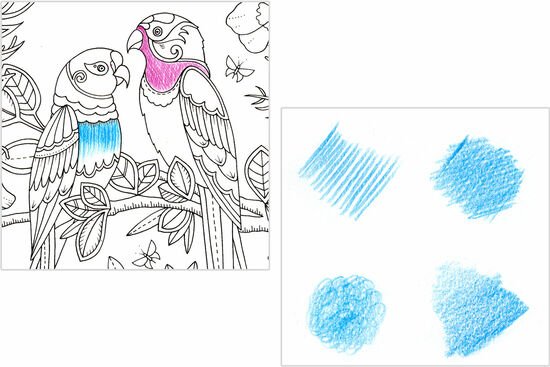
- Burnishing: This is where you really pack the pigment in, using a lot of pressure to smooth out the texture of the paper. Be careful not to break your pencil! It's also harder to add colors on top after burnishing. You've been warned!
- Blending: Get those colors to play nicely together! You can blend with a colorless blender pencil (basically a wax stick), a solvent (like odorless mineral spirits - but be careful and use proper ventilation!), or even just with lighter layers. Experiment and see what you like!
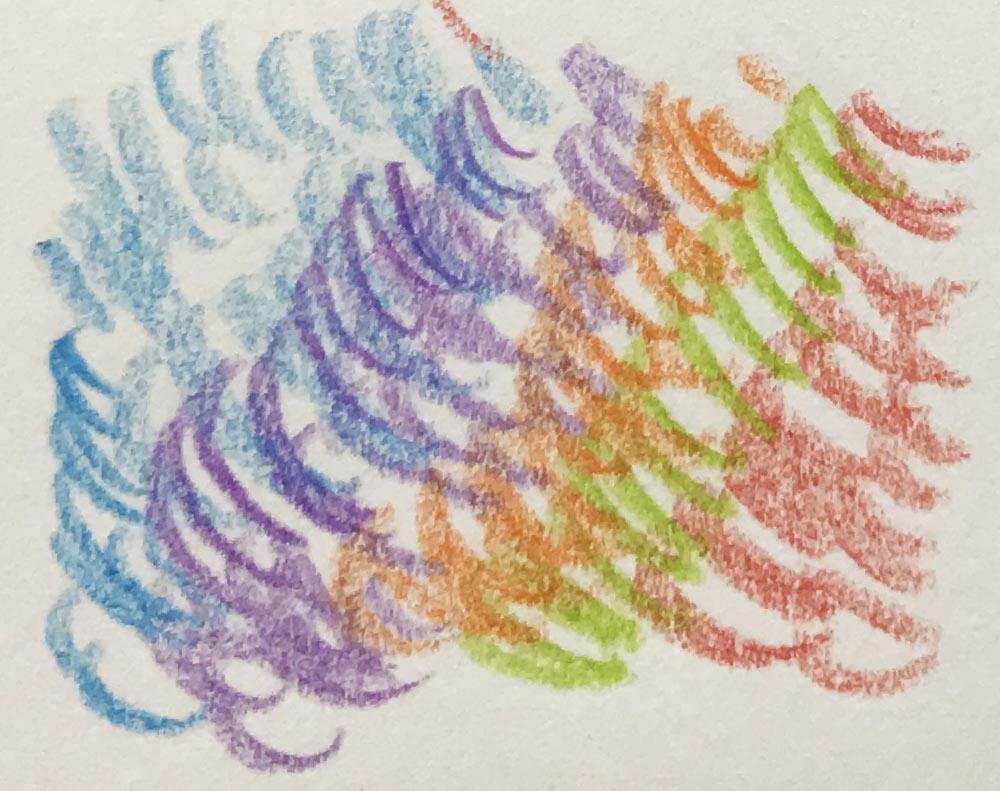
- Hatching & Cross-Hatching: These are great for creating texture and value. Hatching is drawing parallel lines, and cross-hatching is, well, crossing those lines! The closer the lines, the darker the area appears. Super useful for shading!
- Stippling: Tiny dots, my friend! It’s tedious, I admit, but it can create a really cool, grainy effect. Perfect for fur, sand, or anything with a bit of texture.
Beyond the Basics: Level Up Your Skills
Alright, you've mastered the basics. Now what? Time to experiment!

- Underpainting: Use a different medium (like watercolor or even alcohol markers) to create a base layer of color. This can save you tons of time with the colored pencils!
- Lifting Color: Yes, you can remove colored pencil! Gently use a kneaded eraser to lift some of the pigment. This is especially useful for highlights.
- Mixed Media: Don't be afraid to combine colored pencils with other mediums like pastels, charcoal, or even pens! The possibilities are endless!
Remember: The best way to learn is to practice. Grab some pencils, some paper, and start experimenting! Don't be afraid to make mistakes (we all do!). And most importantly, have fun!
So, ditch the childhood notion of colored pencils being just for coloring books. They're a powerful tool, ready to help you create some truly stunning art. Now, go forth and color!