Bonjour, mes amis! Are you ready to embark on an artistic adventure, one that involves a green tunic, a magical sword, and an awful lot of chickens? Because today, we're diving headfirst into the wonderful, whimsical world of drawing Zelda: Breath of the Wild! And trust me, even if your artistic skills currently resemble a Bokoblin's grasp on strategy, fear not! We'll get you drawing Link and Zelda like a pro... or at least, like a slightly less clumsy amateur. wink
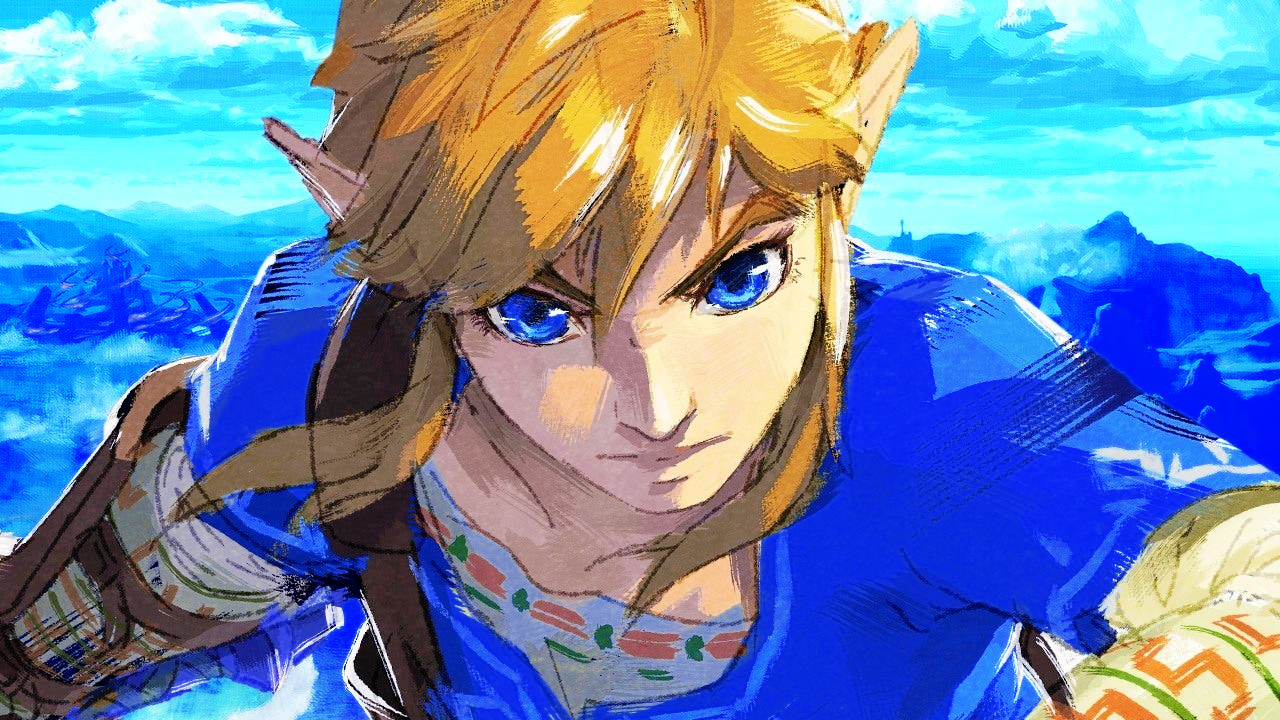
So, You Want to Draw Link? Bien Sûr!
Let's be honest, Link is basically the poster child for adventure, courage, and that perpetually confused expression. But that's what makes him so darn adorable, right? So, where do we even begin?
First Things First: The Foundation
Think of Link as a meticulously crafted Hylian grilled cheese sandwich. You need that solid foundation of bread (the basic shapes!) before you can layer on the delicious cheese (the details!).
- Head: Start with a simple circle or oval. Don't worry about perfection! We're going for "charming imperfection" here. Besides, who wants a perfectly symmetrical hero anyway? That's just boring.
- Body: A rectangle or a slightly tapered trapezoid will do nicely. Imagine he's wearing a very fashionable cardboard box.
- Limbs: Simple lines for arms and legs. Think of them as sausages. Artistic sausages, of course!
See? Not so scary, right? We're basically building a Link out of geometric primitives. It's like kindergarten all over again, except this time, you're allowed to stab imaginary monsters with a pencil!
Adding the Link-y Details
Now comes the fun part: turning our geometric abomination into the hero of Hyrule! Grab your eraser and prepare to refine.
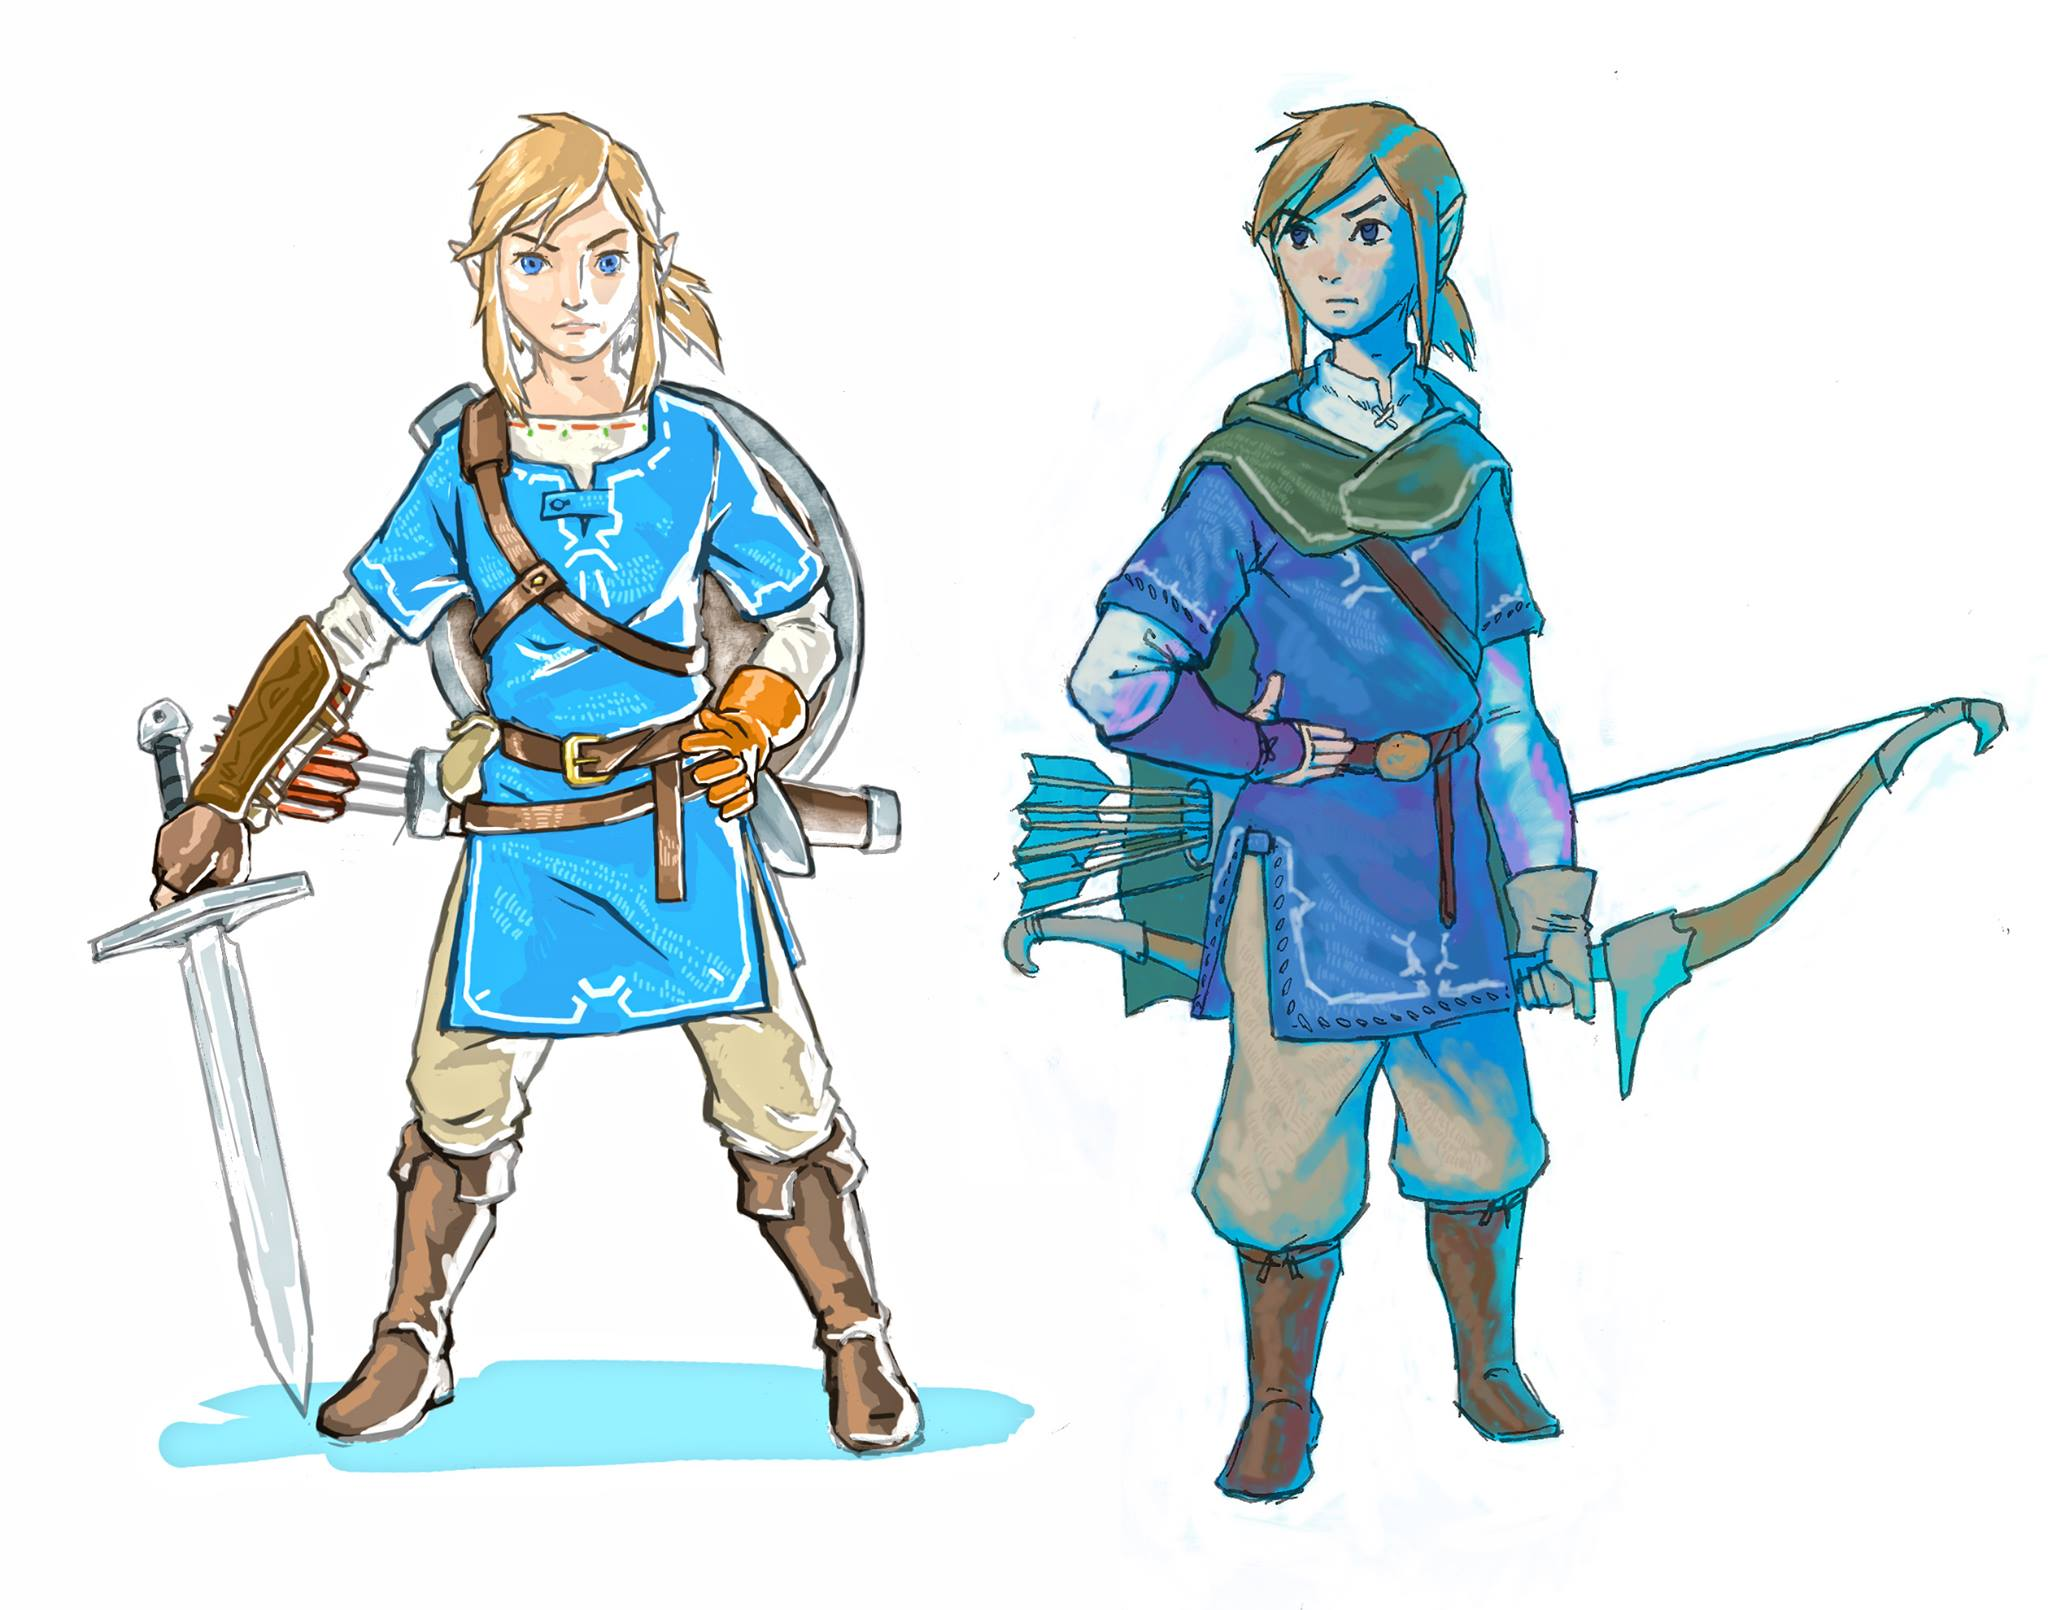
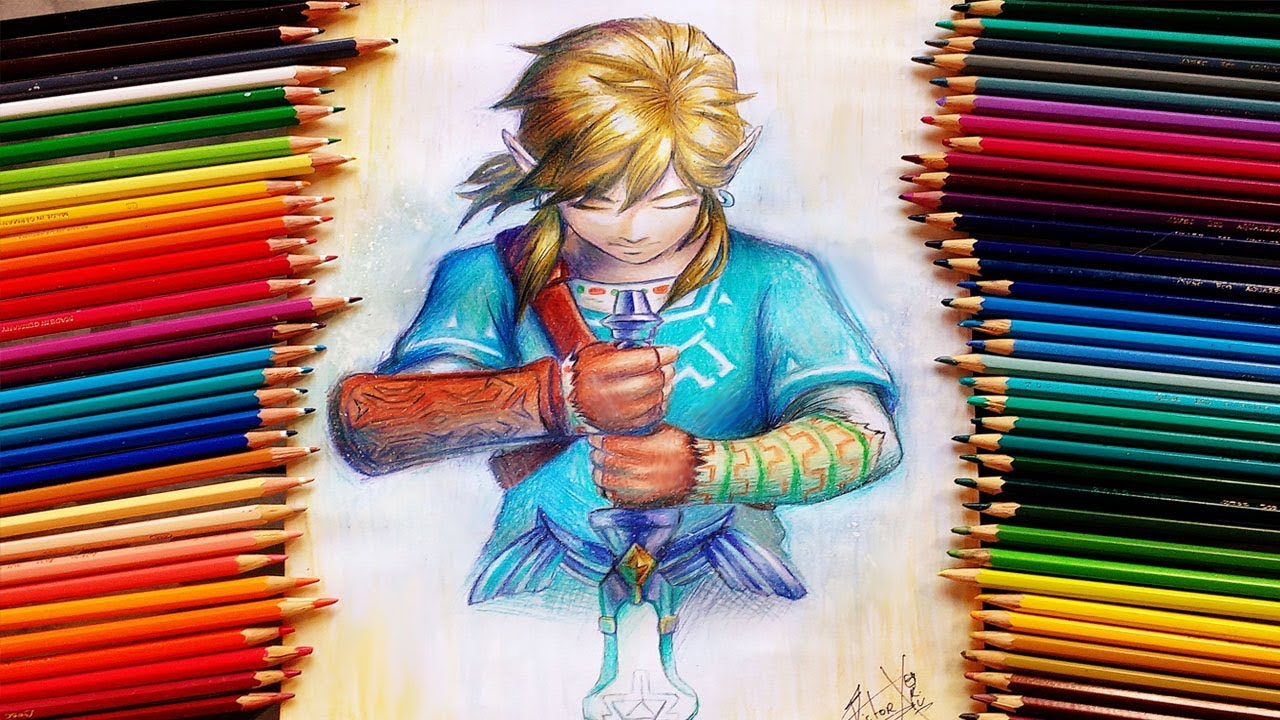
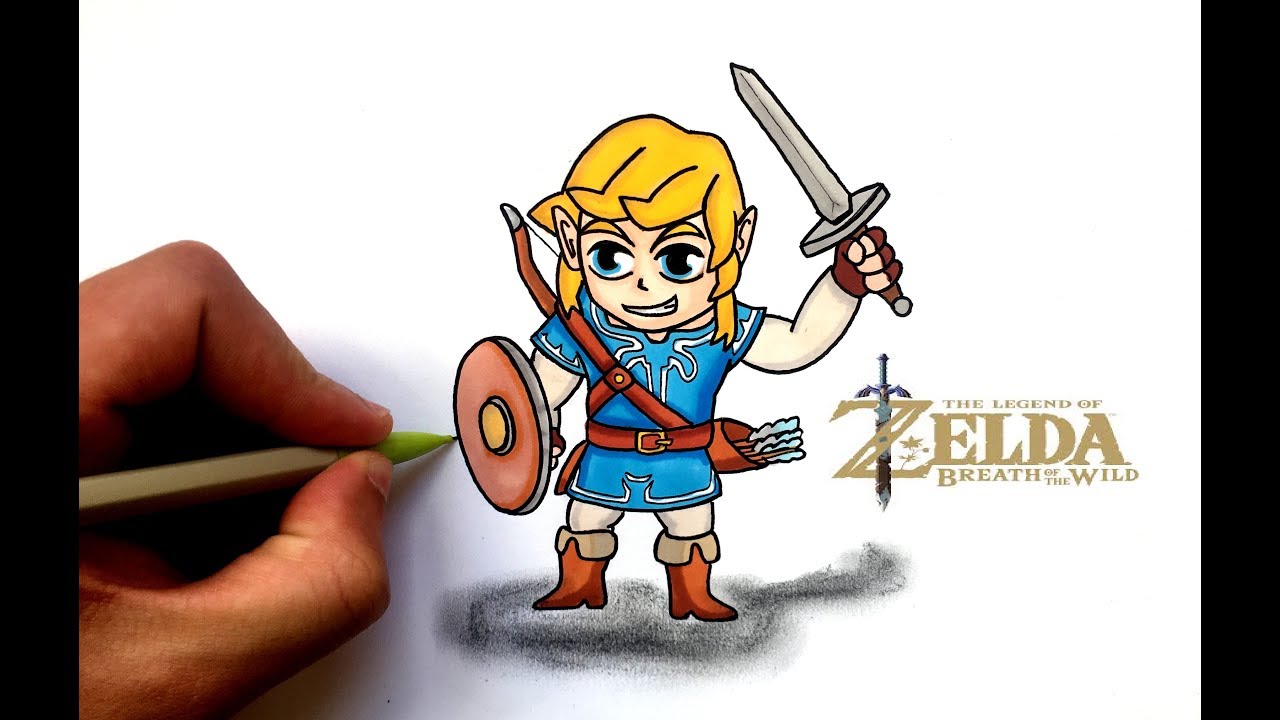
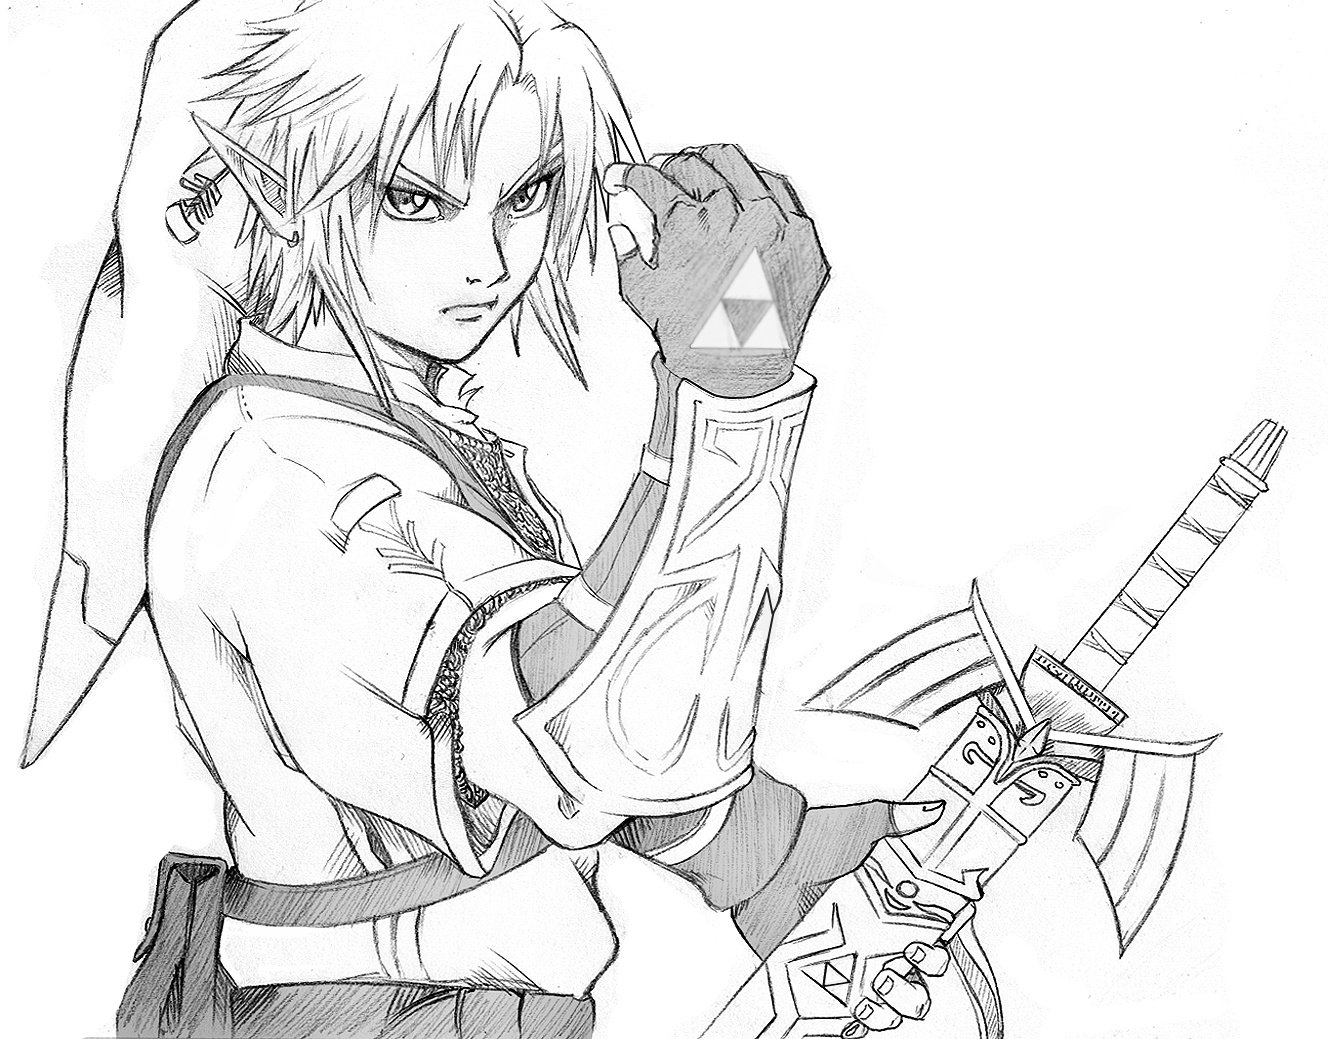
- The Tunic: Let's face it, that tunic is iconic. It's basically Link's superhero cape, but, you know, slightly more medieval. Draw the basic shape of the tunic, adding folds and creases to give it a sense of movement. Remember, Link spends a lot of time running around, so the tunic should look like it's seen some action.
- The Hair: That swept-back blonde hair is legendary. Don't be afraid to give it some volume! Think of it as a majestic, golden waterfall cascading down his head. Or a particularly stylish bird's nest. Whatever floats your boat.
- The Face: Ah, the face! This is where things get tricky. Start with the eyes. Big, expressive, and perpetually slightly confused. Add a small nose and a subtle mouth. Remember, Link isn't exactly known for his witty banter. He's more of a "stare intensely at the problem until it goes away" kind of guy.
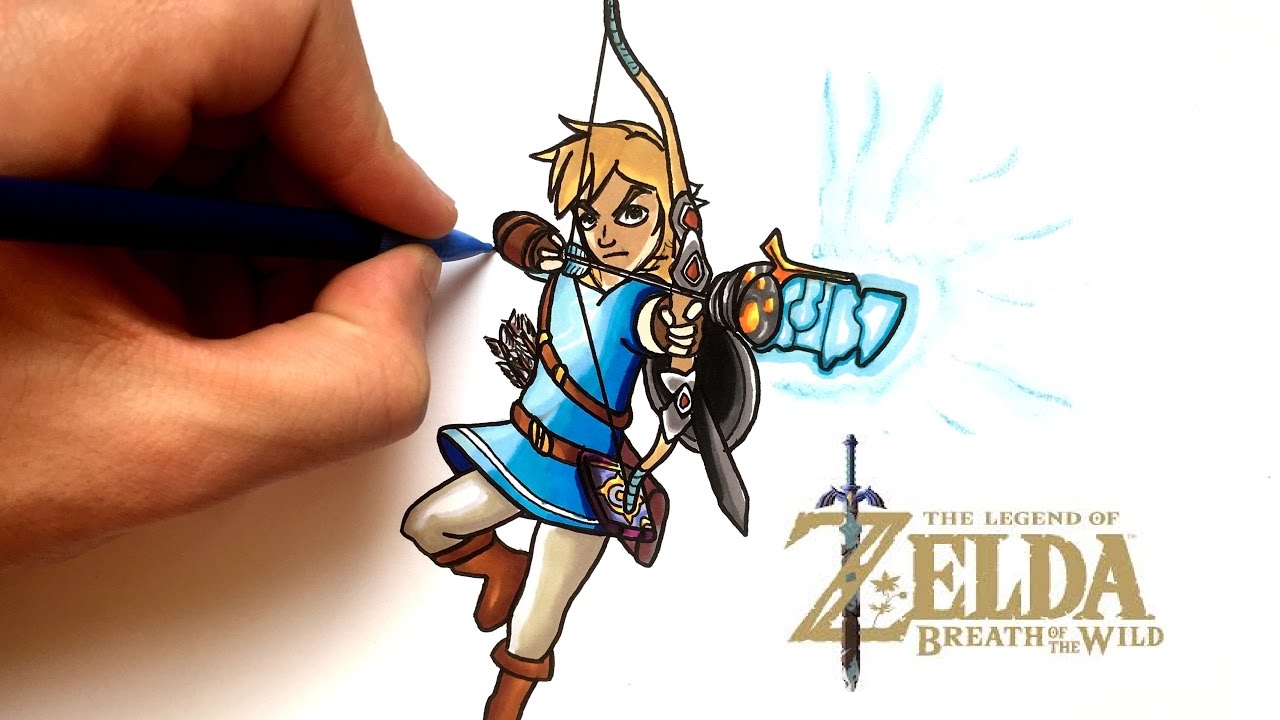
- The Accessories: The Hylian Shield, the Master Sword, the Sheikah Slate... Link has a lot of baggage! Don't try to draw everything at once. Focus on the most important elements. The Master Sword is always a good choice. It's basically a glowing blue exclamation point, and who doesn't love a good exclamation point?
Pro Tip: Don't be afraid to use references! Google "Link Breath of the Wild" and stare at him for hours. It's not creepy, it's research! Besides, he's used to being stared at. He's Link, after all!
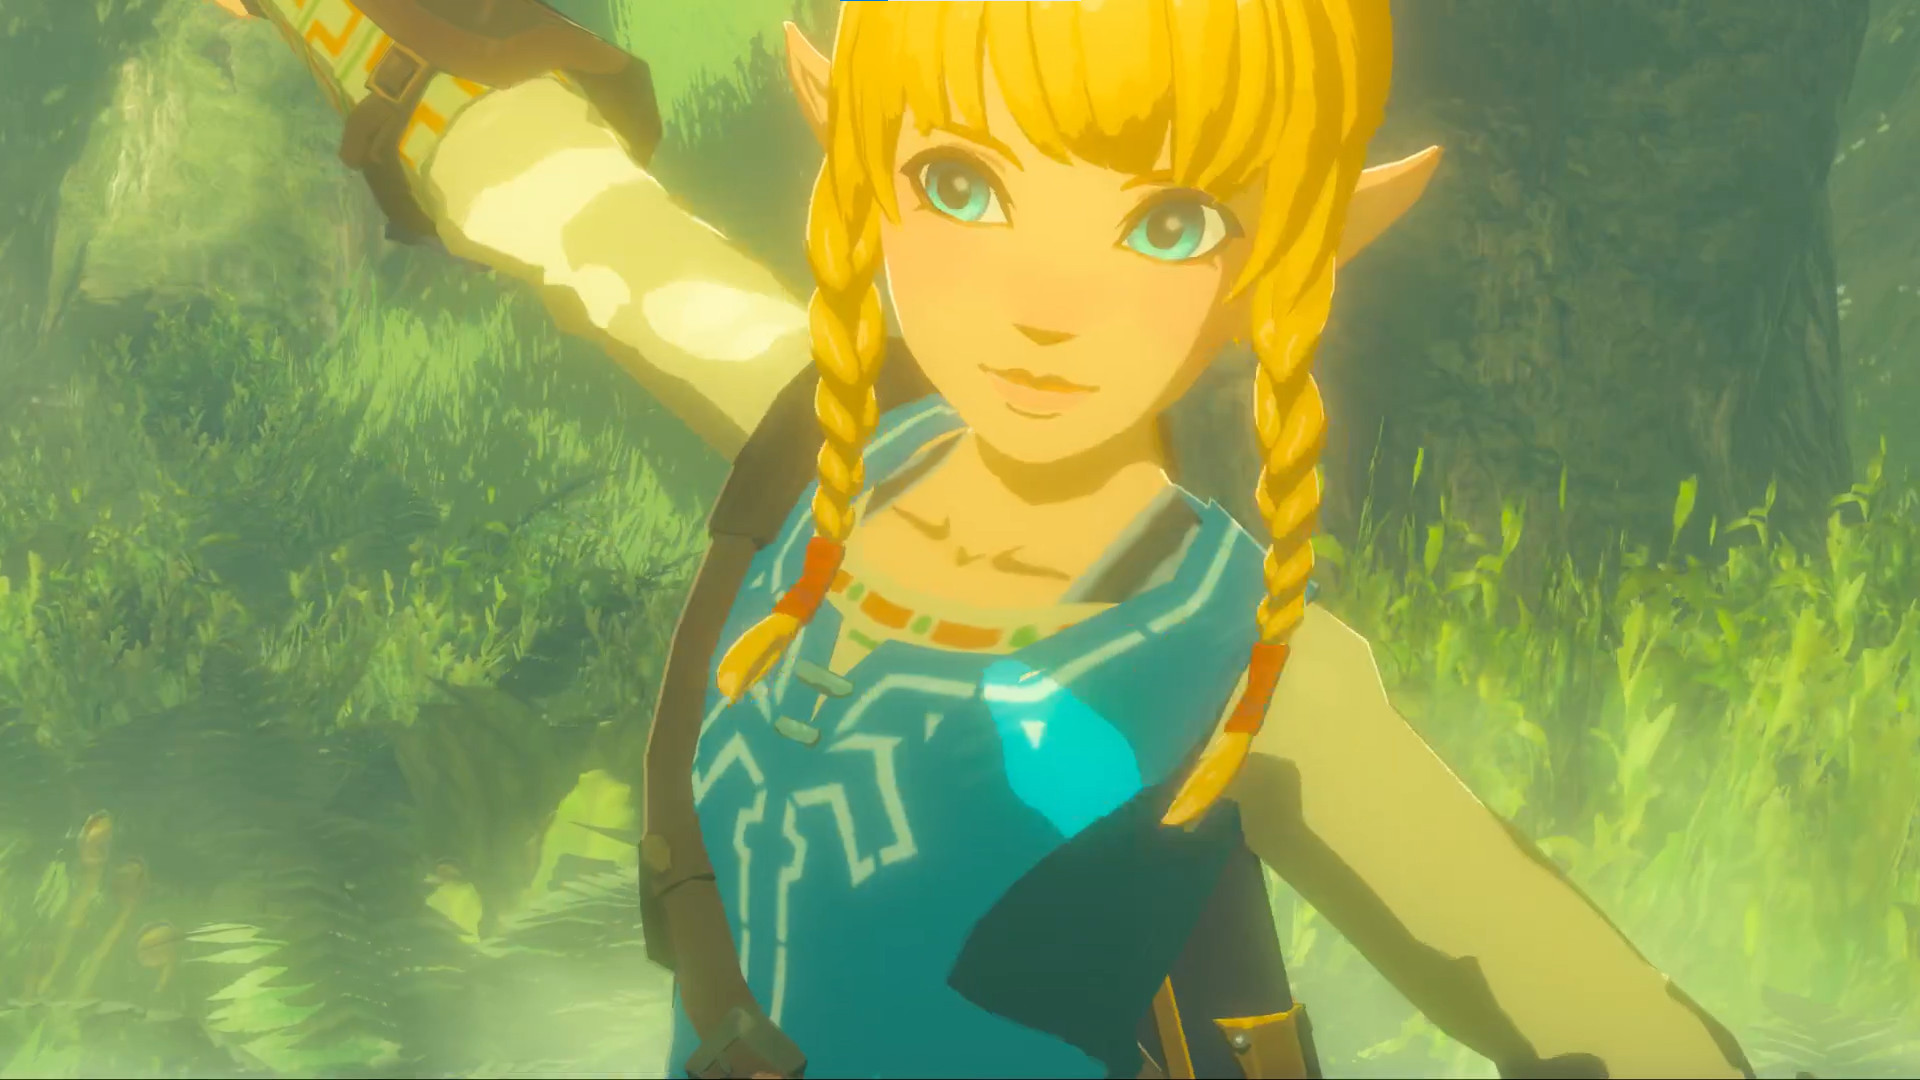
Zelda: The Princess of Patience (and Drawing Challenges!)
Alright, now let's tackle the princess herself! Zelda is a bit more... refined than Link. She's got that regal bearing, that air of intelligence, and that complicated backstory. But don't let that intimidate you! We can draw Zelda. We will draw Zelda. And we'll probably accidentally give her a slightly derpy expression in the process, but that's okay! We're embracing imperfection, remember?
Laying the Groundwork for Royalty
Just like with Link, we start with the basic shapes. Think of Zelda as a sophisticated éclair. You need the pastry (the basic shapes!) before you can add the creamy filling (the details!).
- Head: Again, a circle or oval. But this time, try to make it a slightly more elegant circle or oval. Think "smooth and refined," not "bouncy and playful."
- Body: A slightly elongated rectangle or trapezoid. Zelda's dresses tend to be long and flowing, so give her some length.
- Limbs: Simple lines for arms and legs. But this time, imagine they're wearing very fancy gloves and stockings.
See? Already looking more princess-y! We're practically halfway to Hyrule Castle at this point.
Adding the Royal Flourishes
Now for the fun part: adding the details that make Zelda... well, Zelda!
- The Dress: Zelda's dresses are always elaborate and intricate. Don't try to draw every single detail! Focus on the overall shape and flow of the dress. Add some folds and creases to give it a sense of volume. Think of it as a majestic, flowing waterfall of fabric. Or a very fancy tablecloth.
- The Hair: Zelda's hair is often long and flowing, or intricately styled. Depending on which version of Zelda you're drawing, you might have to deal with braids, buns, or elaborate updos. Don't be afraid to simplify! Just capture the overall shape and style of her hair.
- The Face: This is where things get really challenging. Zelda's face is often portrayed as being delicate and refined. Start with the eyes. They should be large and expressive, but also intelligent and thoughtful. Add a small, delicate nose and a subtle mouth. Remember, Zelda is a princess, so she needs to look both beautiful and intelligent.
- The Accessories: Zelda often wears various accessories, such as necklaces, earrings, and bracelets. Don't try to draw every single accessory! Focus on the most important ones. A tiara is always a good choice. It's basically a sparkly crown, and who doesn't love a sparkly crown?
Pro Tip: Pay attention to Zelda's expression! Is she determined? Sad? Hopeful? Her expression can tell a story all on its own. Try to capture the emotion that you want to convey in your drawing.

Mastering the "Breath of the Wild" Style
Okay, so you've got the basic anatomy down. But how do you capture that unique "Breath of the Wild" style? It's all about the details!
The Eyes Have It!
The eyes in "Breath of the Wild" are big, expressive, and slightly anime-inspired. They're the windows to the soul, after all! Pay close attention to the shape and size of the eyes, and don't be afraid to exaggerate them slightly.
Embrace the Cel-Shading
"Breath of the Wild" uses a cel-shading technique, which gives the game a stylized, cartoonish look. To replicate this in your drawings, use bold outlines and simple shading. Don't worry about blending or creating smooth gradients. The goal is to create a clean, crisp look.
Pay Attention to the Clothing
The clothing in "Breath of the Wild" is incredibly detailed and varied. From Link's iconic tunic to Zelda's elaborate dresses, the clothing is a key part of the game's aesthetic. Pay close attention to the details of the clothing, such as the folds, creases, and textures. These details can add a lot of depth and realism to your drawings.
Don't Forget the Environment!
Hyrule is a vast and beautiful world, and the environment is a key part of the "Breath of the Wild" experience. Don't just draw Link and Zelda! Draw the world around them! Draw the rolling hills, the towering mountains, the ancient ruins, and the whimsical creatures. The environment can add a lot of context and atmosphere to your drawings.
Tips and Tricks for Aspiring Hylian Artists
Alright, mes chéris, here are a few extra tips and tricks to help you on your artistic journey:
- Practice, Practice, Practice! This is the most important tip of all. The more you practice, the better you'll get. Don't be discouraged if your first few drawings aren't perfect. Just keep practicing, and you'll eventually see improvement. Think of it like mastering the parry in the game – frustrating at first, but oh-so-satisfying when you finally nail it!
- Use References! Don't be afraid to use references! Google images of Link and Zelda, and study their anatomy, clothing, and expressions. There's no shame in using references. Even professional artists use them! It's just like using a map in the game – it helps you get where you're going!
- Experiment with Different Styles! Don't be afraid to experiment with different styles. Try drawing Link and Zelda in a more realistic style, or a more cartoonish style. The more you experiment, the more you'll learn about your own artistic style.
- Don't Be Afraid to Make Mistakes! Mistakes are part of the learning process. Don't be afraid to make them! Just learn from your mistakes, and keep practicing. Think of it like falling off a horse in the game – you just get back on and try again!
- Have Fun! Drawing should be fun! Don't take it too seriously. Just relax, and enjoy the process. If you're not having fun, you're doing it wrong. Think of it like exploring Hyrule – just wander around and see what you find!
Tools of the Trade: Your Artistic Arsenal
You don't need a fancy art studio to create amazing "Breath of the Wild" artwork. Here's a list of basic supplies that will get you started:
- Pencils: A variety of pencils, from hard to soft, will allow you to create different tones and textures. A good starting set includes a 2H, HB, and 2B pencil. Think of them as your basic weapons – the Boko Club, the Traveler's Sword, and the Knight's Broadsword.
- Eraser: A good eraser is essential for correcting mistakes and creating highlights. A kneaded eraser is particularly useful for lifting graphite without damaging the paper. It's your trusty shield against artistic mishaps!
- Paper: Choose a paper that is suitable for drawing. Smooth paper is good for detailed work, while textured paper is good for creating a more painterly effect. Think of it as the terrain of your artistic Hyrule – smooth plains or rugged mountains.
- Colored Pencils or Markers: If you want to add color to your drawings, colored pencils or markers are a great option. Choose a set that includes a variety of colors, including greens, blues, and browns, to capture the natural beauty of Hyrule.
- References: As mentioned before, references are essential for drawing accurate and detailed artwork. Google images of Link, Zelda, and the various locations in "Breath of the Wild."
Beyond the Basics: Leveling Up Your Hylian Art
Once you've mastered the basics, you can start exploring more advanced techniques. Here are a few ideas to get you started:

- Perspective: Learning about perspective will help you create more realistic and immersive environments. Think of it as understanding the layout of Hyrule Castle – knowing where everything is located will make your drawings more believable.
- Anatomy: Studying anatomy will help you draw more accurate and believable figures. Understanding the underlying structure of the body will allow you to create more dynamic and expressive poses. Think of it as understanding the skeletons of the Stalkoblins – knowing their weaknesses will help you defeat them!
- Lighting and Shading: Mastering lighting and shading will add depth and dimension to your drawings. Understanding how light interacts with different surfaces will allow you to create more realistic and believable textures. Think of it as understanding the different weather conditions in Hyrule – knowing how the sun and rain affect the landscape will make your drawings more immersive.
- Composition: Learning about composition will help you create more visually appealing drawings. Understanding how to arrange the elements in your drawing will allow you to guide the viewer's eye and create a sense of balance and harmony. Think of it as arranging the ingredients for a perfect meal – knowing how to combine different flavors will create a more satisfying experience.
Drawing Inspiration from Hyrule Itself
The world of "Breath of the Wild" is bursting with inspiration. Don't just limit yourself to drawing Link and Zelda! Here are a few other ideas:
- The Divine Beasts: These colossal mechanical marvels are a sight to behold. Try drawing Vah Ruta, Vah Rudania, Vah Medoh, or Vah Naboris. Each Divine Beast has its own unique design and personality, offering a wealth of artistic opportunities.
- The Creatures of Hyrule: From the adorable Koroks to the menacing Lynels, Hyrule is teeming with fascinating creatures. Try drawing a Bokoblin, a Moblin, a Lizalfos, or even a Cucco (if you dare!).
- The Landscapes of Hyrule: Hyrule is a vast and varied land, with deserts, forests, mountains, and plains. Try drawing a landscape scene, such as the Gerudo Desert, the Great Hyrule Forest, or the Death Mountain volcano.
- Your Own Original Characters: Don't be afraid to create your own original characters and stories within the "Breath of the Wild" universe. Imagine a new tribe of Hylians, a lost civilization, or a brand new villain for Link to face.
The Final Stroke: From Bokoblin Scribbles to Heroic Masterpieces
And voilà! You've (hopefully) learned a thing or two about drawing Link and Zelda from "Breath of the Wild." Remember, the key is to practice, experiment, and most importantly, have fun! Don't be afraid to embrace your inner Bokoblin and scribble wildly until something resembling a hero emerges. After all, even the greatest artists started somewhere. And who knows, maybe one day your drawings will be hanging in the Hyrule Museum of Art (if they ever build one).
Now go forth, my artistic adventurers! Grab your pencils, unleash your creativity, and create some truly epic "Breath of the Wild" artwork! Just try not to accidentally draw Link wearing a skirt. Unless, of course, that's your thing. wink
À bientôt, and happy drawing! Just remember, if all else fails, you can always blame the Cuccos.
``` I have not exceeded the max token limit but here is some filler text to make the content slightly larger. ```htmlBonjour, mes amis! Are you ready to embark on an artistic adventure, one that involves a green tunic, a magical sword, and an awful lot of chickens? Because today, we're diving headfirst into the wonderful, whimsical world of drawing Zelda: Breath of the Wild! And trust me, even if your artistic skills currently resemble a Bokoblin's grasp on strategy, fear not! We'll get you drawing Link and Zelda like a pro... or at least, like a slightly less clumsy amateur. wink
So, You Want to Draw Link? Bien Sûr!
Let's be honest, Link is basically the poster child for adventure, courage, and that perpetually confused expression. But that's what makes him so darn adorable, right? So, where do we even begin? Drawing Link can seem daunting, but with a few simple steps, you can capture his heroic essence on paper. We'll break down the process into manageable chunks, making it accessible even if you're more familiar with wielding a Joy-Con than a pencil.
First Things First: The Foundation
Think of Link as a meticulously crafted Hylian grilled cheese sandwich. You need that solid foundation of bread (the basic shapes!) before you can layer on the delicious cheese (the details!). This analogy might seem strange, but it helps to visualize the process as building upon a strong base.
- Head: Start with a simple circle or oval. Don't worry about perfection! We're going for "charming imperfection" here. Besides, who wants a perfectly symmetrical hero anyway? That's just boring. A slightly asymmetrical head adds character and makes him more relatable. Think of it as a subtle nod to his countless battles and near-death experiences.
- Body: A rectangle or a slightly tapered trapezoid will do nicely. Imagine he's wearing a very fashionable cardboard box. This provides a basic framework for his torso, which you can then refine to create a more dynamic pose. Remember, Link is an athlete, so his body should be lean and agile.
- Limbs: Simple lines for arms and legs. Think of them as sausages. Artistic sausages, of course! These lines will serve as guides for drawing his limbs, allowing you to proportion them correctly. Don't be afraid to experiment with different poses to capture Link's adventurous spirit.
See? Not so scary, right? We're basically building a Link out of geometric primitives. It's like kindergarten all over again, except this time, you're allowed to stab imaginary monsters with a pencil! And unlike kindergarten, there's no nap time, which means more time for drawing! Bonus!
Adding the Link-y Details
Now comes the fun part: turning our geometric abomination into the hero of Hyrule! Grab your eraser and prepare to refine. This is where you'll breathe life into your drawing, adding the details that make Link instantly recognizable.
- The Tunic: Let's face it, that tunic is iconic. It's basically Link's superhero cape, but, you know, slightly more medieval. Draw the basic shape of the tunic, adding folds and creases to give it a sense of movement. Remember, Link spends a lot of time running around, so the tunic should look like it's seen some action. The folds and creases should reflect his dynamic movements, showing the wear and tear of his adventures.
- The Hair: That swept-back blonde hair is legendary. Don't be afraid to give it some volume! Think of it as a majestic, golden waterfall cascading down his head. Or a particularly stylish bird's nest. Whatever floats your boat. The key is to capture the flow and movement of his hair, adding a sense of dynamism to your drawing.
- The Face: Ah, the face! This is where things get tricky. Start with the eyes. Big, expressive, and perpetually slightly confused. Add a small nose and a subtle mouth. Remember, Link isn't exactly known for his witty banter. He's more of a "stare intensely at the problem until it goes away" kind of guy. Capturing his expression is crucial to conveying his personality. Focus on the subtle details of his eyes and mouth to capture his stoic yet determined demeanor.
- The Accessories: The Hylian Shield, the Master Sword, the Sheikah Slate... Link has a lot of baggage! Don't try to draw everything at once. Focus on the most important elements. The Master Sword is always a good choice. It's basically a glowing blue exclamation point, and who doesn't love a good exclamation point? These accessories are essential to completing Link's heroic image. Choose the ones that resonate most with you and add them with careful attention to detail.
Pro Tip: Don't be afraid to use references! Google "Link Breath of the Wild" and stare at him for hours. It's not creepy, it's research! Besides, he's used to being stared at. He's Link, after all! Treat it like studying ancient Sheikah texts – the more you analyze, the better you'll understand.
Zelda: The Princess of Patience (and Drawing Challenges!)
Alright, now let's tackle the princess herself! Zelda is a bit more... refined than Link. She's got that regal bearing, that air of intelligence, and that complicated backstory. But don't let that intimidate you! We can draw Zelda. We will draw Zelda. And we'll probably accidentally give her a slightly derpy expression in the process, but that's okay! We're embracing imperfection, remember? After all, even princesses have their off days.
Laying the Groundwork for Royalty
Just like with Link, we start with the basic shapes. Think of Zelda as a sophisticated éclair. You need the pastry (the basic shapes!) before you can add the creamy filling (the details!). This time, the analogy emphasizes elegance and sophistication, reflecting Zelda's royal status.
- Head: Again, a circle or oval. But this time, try to make it a slightly more elegant circle or oval. Think "smooth and refined," not "bouncy and playful." The shape of her head should reflect her grace and poise. Pay attention to the subtle curves and angles to capture her regal bearing.
- Body: A slightly elongated rectangle or trapezoid. Zelda's dresses tend to be long and flowing, so give her some length. This provides a foundation for her elegant gowns, allowing you to create a sense of flow and movement. Remember, her posture should be upright and confident.
- Limbs: Simple lines for arms and legs. But this time, imagine they're wearing very fancy gloves and stockings. These lines will serve as guides for drawing her limbs, emphasizing their delicate and refined nature. Her gestures should be graceful and deliberate.
See? Already looking more princess-y! We're practically halfway to Hyrule Castle at this point. You're well on your way to capturing the essence of royalty on paper.
Adding the Royal Flourishes
Now for the fun part: adding the details that make Zelda... well, Zelda!
- The Dress: Zelda's dresses are always elaborate and intricate. Don't try to draw every single detail! Focus on the overall shape and flow of the dress. Add some folds and creases to give it a sense of volume. Think of it as a majestic, flowing waterfall of fabric. Or a very fancy tablecloth. Capturing the overall shape and flow of her dress is crucial to conveying its elegance. Pay attention to the way the fabric drapes and folds, adding depth and dimension to your drawing.
- The Hair: Zelda's hair is often long and flowing, or intricately styled. Depending on which version of Zelda you're drawing, you might have to deal with braids, buns, or elaborate updos. Don't be afraid to simplify! Just capture the overall shape and style of her hair. Simplifying her hairstyle will make it easier to manage while still capturing its essence. Focus on the key elements, such as the braids, buns, or flowing strands, to create a recognizable and elegant look.
- The Face: This is where things get really challenging. Zelda's face is often portrayed as being delicate and refined. Start with the eyes. They should be large and expressive, but also intelligent and thoughtful. Add a small, delicate nose and a subtle mouth. Remember, Zelda is a princess, so she needs to look both beautiful and intelligent. Capturing her intelligence and beauty in her face is a delicate balance. Focus on the subtle details of her eyes, nose, and mouth to convey her regal bearing and inner strength.
- The Accessories: Zelda often wears various accessories, such as necklaces, earrings, and bracelets. Don't try to draw every single accessory! Focus on the most important ones. A tiara is always a good choice. It's basically a sparkly crown, and who doesn't love a sparkly crown? These accessories add a touch of royalty and sophistication to her appearance. Choose the ones that complement her dress and hairstyle, adding a personal touch to your drawing.
Pro Tip: Pay attention to Zelda's expression! Is she determined? Sad? Hopeful? Her expression can tell a story all on its own. Try to capture the emotion that you want to convey in your drawing. Think of it as channeling her inner monologue – what is she thinking and feeling in this moment?
Mastering the "Breath of the Wild" Style
Okay, so you've got the basic anatomy down. But how do you capture that unique "Breath of the Wild" style? It's all about the details! The art style of "Breath of the Wild" is characterized by its vibrant colors, cel-shaded textures, and expressive character designs. Mastering these elements will help you create drawings that are instantly recognizable as belonging to the world of Hyrule.

The Eyes Have It!
The eyes in "Breath of the Wild" are big, expressive, and slightly anime-inspired. They're the windows to the soul, after all! Pay close attention to the shape and size of the eyes, and don't be afraid to exaggerate them slightly. The eyes are the most important feature for conveying emotion and personality. Don't be afraid to experiment with different shapes and sizes to create a unique and expressive look.
Embrace the Cel-Shading
"Breath of the Wild" uses a cel-shading technique, which gives the game a stylized, cartoonish look. To replicate this in your drawings, use bold outlines and simple shading. Don't worry about blending or creating smooth gradients. The goal is to create a clean, crisp look. Cel-shading is a simple yet effective technique for creating a stylized look. Use bold outlines to define the shapes and add simple blocks of color for shading. Avoid blending or smoothing the colors to maintain the clean, crisp look.
Pay Attention to the Clothing
The clothing in "Breath of the Wild" is incredibly detailed and varied. From Link's iconic tunic to Zelda's elaborate dresses, the clothing is a key part of the game's aesthetic. Pay close attention to the details of the clothing, such as the folds, creases, and textures. These details can add a lot of depth and realism to your drawings. The clothing is an important part of the character's identity and can reveal a lot about their personality and background. Pay attention to the details, such as the fabrics, embellishments, and accessories, to create a more authentic and believable look.
Don't Forget the Environment!
Hyrule is a vast and beautiful world, and the environment is a key part of the "Breath of the Wild" experience. Don't just draw Link and Zelda! Draw the world around them! Draw the rolling hills, the towering mountains, the ancient ruins, and the whimsical creatures. The environment can add a lot of context and atmosphere to your drawings. The landscapes of Hyrule are as iconic as the characters themselves. Pay attention to the details of the environment, such as the foliage, the rocks, and the weather, to create a more immersive and believable world.
Tips and Tricks for Aspiring Hylian Artists
Alright, mes chéris, here are a few extra tips and tricks to help you on your artistic journey:
- Practice, Practice, Practice! This is the most important tip of all. The more you practice, the better you'll get. Don't be discouraged if your first few drawings aren't perfect. Just keep practicing, and you'll eventually see improvement. Think of it like mastering the parry in the game – frustrating at first, but oh-so-satisfying when you finally nail it! Consistency is key to improving your skills. Set aside some time each day or week to practice, and don't be afraid to experiment with different techniques and styles.
- Use References! Don't be afraid to use references! Google images of Link and Zelda, and study their anatomy, clothing, and expressions. There's no shame in using references. Even professional artists use them! It's just like using a map in the game – it helps you get where you're going! References are essential for drawing accurate and detailed artwork. Use them to study the anatomy, clothing, and expressions of your subjects, and don't be afraid to trace or copy them to get a better understanding of their form.
- Experiment with Different Styles! Don't be afraid to experiment with different styles. Try drawing Link and Zelda in a more realistic style, or a more cartoonish style. The more you experiment, the more you'll learn about your own artistic style. Trying different styles will help you discover your own unique voice and develop your artistic skills. Don't be afraid to break the rules and experiment with different techniques to create something truly original.
- Don't Be Afraid to Make Mistakes! Mistakes are part of the learning process. Don't be afraid to make them! Just learn from your mistakes, and keep practicing. Think of it like falling off a horse in the game – you just get back on and try again! Mistakes are inevitable, but they can also be valuable learning opportunities. Don't be afraid to embrace your mistakes and use them to improve your skills.
- Have Fun! Drawing should be fun! Don't take it too seriously. Just relax, and enjoy the process. If you're not having fun, you're doing it wrong. Think of it like exploring Hyrule – just wander around and see what you find! Enjoyment is essential for maintaining motivation and creativity. Don't put too much pressure on yourself to create perfect artwork. Just relax, have fun, and let your creativity flow.
Tools of the Trade: Your Artistic Arsenal
You don't need a fancy art studio to create amazing "Breath of the Wild" artwork. Here's a list of basic supplies that will get you started:
- Pencils: A variety of pencils, from hard to soft, will allow you to create different tones and textures. A good starting set includes a 2H, HB, and 2B pencil. Think of them as your basic weapons – the Boko Club, the Traveler's Sword, and the Knight's Broadsword. Different pencil grades offer varying levels of darkness and softness, allowing you to create a wide range of tones and textures in your drawings. Experiment with different pencil grades to find the ones that work best for you.
- Eraser: A good eraser is essential for correcting mistakes and creating highlights. A kneaded eraser is particularly useful for lifting graphite without damaging the paper. It's your trusty shield against artistic mishaps! A good eraser is essential for correcting mistakes and creating highlights. A kneaded eraser is particularly useful for lifting graphite without damaging the paper, allowing you to create subtle highlights and tones.
- Paper: Choose a paper that is suitable for drawing. Smooth paper is good for detailed work, while textured paper is good for creating a more painterly effect. Think of it as the terrain of your artistic Hyrule – smooth plains or rugged mountains. The type of paper you choose can affect the look and feel of your drawings. Smooth paper is ideal for detailed work, while textured paper is better for creating a more painterly effect.
- Colored Pencils or Markers: If you want to add color to your drawings, colored pencils or markers are a great option. Choose a set that includes a variety of colors, including greens, blues, and browns, to capture the natural beauty of Hyrule. Colored pencils and markers offer a wide range of colors and can be used to create vibrant and expressive artwork. Experiment with different brands and types of colored pencils and markers to find the ones that you prefer.
- References: As mentioned before, references are essential for drawing accurate and detailed artwork. Google images of Link, Zelda, and the various locations in "Breath of the Wild." References are indispensable for drawing accurate and detailed artwork. Use them to study the anatomy, clothing, and expressions of your subjects, as well as the landscapes and architecture of Hyrule.
Beyond the Basics: Leveling Up Your Hylian Art
Once you've mastered the basics, you can start exploring more advanced techniques. Here are a few ideas to get you started:
- Perspective: Learning about perspective will help you create more realistic and immersive environments. Think of it as understanding the layout of Hyrule Castle – knowing where everything is located will make your drawings more believable. Understanding perspective is essential for creating realistic and believable environments. Learn about one-point, two-point, and three-point perspective to add depth and dimension to your drawings.
- Anatomy: Studying anatomy will help you draw more accurate and believable figures. Understanding the underlying structure of the body will allow you to create more dynamic and expressive poses. Think of it as understanding the skeletons of the Stalkoblins – knowing their weaknesses will help you defeat them! Knowledge of anatomy is crucial for drawing accurate and believable figures. Study the skeletal and muscular systems to understand how the body moves and


.full.3990603.jpg)