Okay, mes amis, let's talk watercolor. Aquarelle, if you're feeling fancy. And let's be honest, who isn't feeling fancy when wielding a brush dipped in shimmering pigment? I mean, you're practically Monet, just with slightly less beard and a higher chance of accidentally painting your cat blue.
Aquarelle 101: From Disasterpiece to Masterpiece (Hopefully!)
Look, watercolor gets a bad rap. People think it's all airy-fairy landscapes and delicate floral arrangements. Which, sure, it can be. But it can also be vibrant, bold, and surprisingly forgiving… unlike that one time I tried to make a soufflé. That was unforgiving. Anyway, let's get you started without the soufflé-level anxiety.
The Sacred Trinity: Paint, Paper, and Brushes (Oh My!)
First things first, you need your supplies. Think of them as your artistic Avengers. Without them, you're just… staring blankly at a piece of paper, which, while arguably philosophical, isn’t exactly a finished painting.
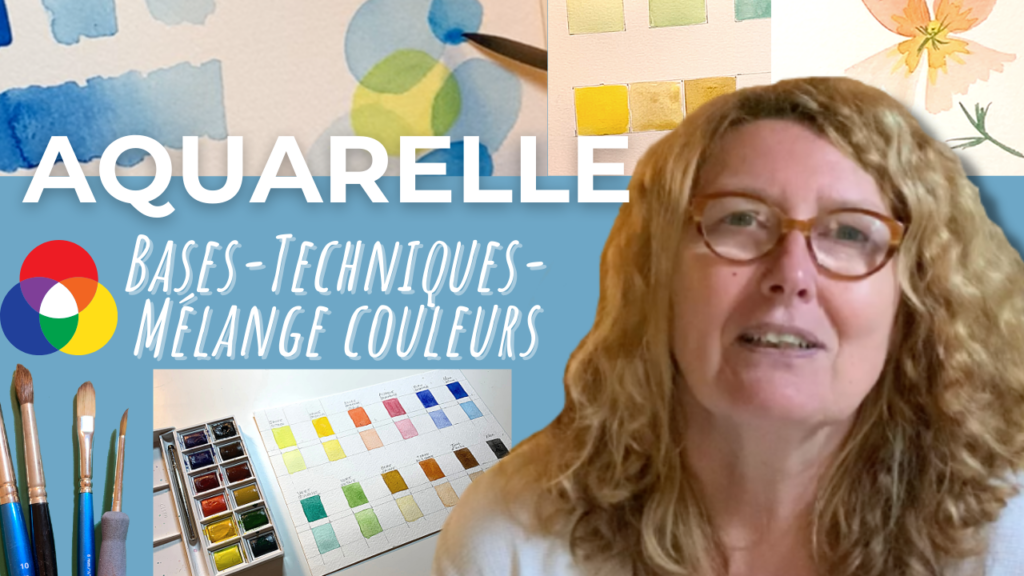
- Paint: Don't go bankrupt on day one! Student-grade paints are perfectly fine to start. Think of them as your artistic training wheels. As you get better (and inevitably addicted), you can upgrade to professional-grade. But for now, embrace the budget-friendliness. You'll be surprised how much beautiful chaos you can create with a simple set.
- Paper: This is where you do want to splurge a little. Cheap paper will buckle, pill, and generally make you want to throw your paint water at the wall. Ask me how I know. Watercolor paper, specifically, is your best friend. It's thicker, more absorbent, and designed to handle all that watery goodness. Look for "cold press" for a textured surface or "hot press" for a smoother one. It’s a matter of preference, like choosing between croissants or pain au chocolat. Both are good, just different.
- Brushes: A good variety of brushes is key. You don't need a million, but a few different sizes and shapes will be your artistic lifesavers. A round brush is great for details, a flat brush for washes, and a few smaller brushes for those tiny, fiddly bits. Think of your brushes as your paint-wielding wands. Now, go forth and conjure some magic! (Just, you know, the artistic kind. Don't try to turn anyone into a frog. Probably illegal.)
Water: The Unsung Hero (Seriously, Don't Forget the Water)
It’s called watercolor for a reason, folks. Water is your friend. It's what makes the paint flow, blend, and generally do its watercolor-y thing. Keep two jars of water handy: one for rinsing your brushes and one for diluting your paint. This prevents you from ending up with murky, muddy colors that look like they belong in a swamp rather than on your masterpiece. Change the rinsing water frequently, especially when using dark colors. Unless you're going for "Swamp Thing Chic," of course.
Basic Techniques: Painting Like a Pro (or at Least Looking Like One)
Alright, time to get our hands dirty… well, hopefully not too dirty. Let's dive into some basic techniques that will have you painting like a seasoned artist (or at least someone who doesn't accidentally paint their ceiling blue – personal experience alert!).

1. Washes: The Foundation of Everything (Like Baguettes in France)
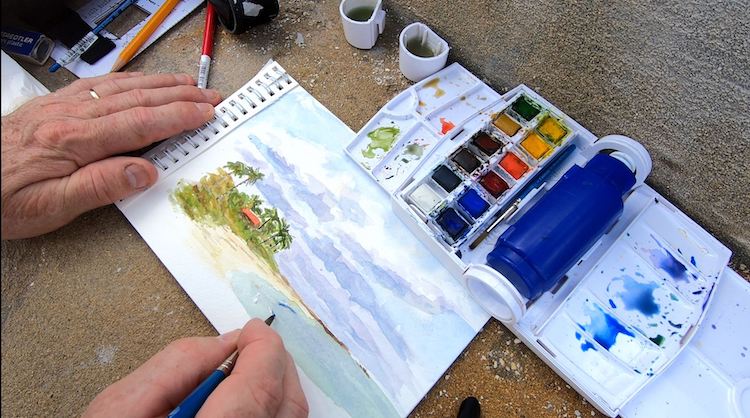
A wash is basically a large, even layer of diluted paint. It's perfect for backgrounds, skies, or any area where you want a smooth, blended color. To create a wash, wet your paper first (this is called a "wet-on-wet" technique). Then, load your brush with diluted paint and apply it in smooth, overlapping strokes. Tilt your paper slightly to help the paint flow evenly. The key is to work quickly and avoid letting the paint dry in patches. Think of it as spreading butter on a warm baguette – you want it smooth and even, not clumpy and uneven.
2. Wet-on-Wet: Where the Magic Happens (and Sometimes the Mistakes!)
Wet-on-wet is exactly what it sounds like: applying wet paint to wet paper. This technique creates soft, dreamy effects and is perfect for blending colors. It's also a bit unpredictable, which can be both exciting and terrifying. To use wet-on-wet, wet your paper with clean water. Then, apply your paint and watch the colors blend and mingle. The wetter the paper, the more the colors will spread. Just be careful not to overdo it, or you'll end up with a muddy mess. Trust me, I’ve been there. It looked like a unicorn cried all over my paper.

3. Wet-on-Dry: Precision and Control (For When You Need to Be a Little More Disciplined)
Wet-on-dry is the opposite of wet-on-wet: applying wet paint to dry paper. This technique gives you more control over your brushstrokes and allows you to create sharp lines and defined shapes. It's perfect for adding details or creating crisp edges. Just remember that the paint will dry faster on dry paper, so you need to work quickly. Think of it as drawing with a slightly damp crayon. You get defined lines, but you still have some room to blend.
4. Dry Brush: Texture and Grit (Adding Some Character)
Dry brush is exactly what it sounds like: using a brush with very little water to create a textured, scratchy effect. To use this technique, dip your brush in paint, then blot off most of the moisture on a paper towel. Drag the brush across your paper to create a broken, textured line. This technique is great for adding details like tree bark, grass, or fur. It's like giving your painting a little bit of a bad-boy edge.

5. Lifting: The Eraser of Watercolor (Your Get-Out-of-Jail-Free Card)
Watercolor is notoriously difficult to erase, but lifting is your secret weapon. Lifting is the process of removing paint from your paper with a clean, damp brush or a sponge. This technique is perfect for correcting mistakes, creating highlights, or adding texture. Simply dampen your brush or sponge and gently blot the area you want to lighten. Be careful not to scrub too hard, or you'll damage the paper. It's like performing artistic surgery – delicate and precise (and hopefully without any screaming).
Tips and Tricks: Level Up Your Watercolor Game
Now that you know the basics, let's talk about some tips and tricks that will help you take your watercolor skills to the next level. These are the kinds of secrets that watercolor masters guard jealously… but I'm feeling generous today. (Probably because I had too much coffee.)
- Practice, Practice, Practice: This is the most important tip of all. The more you paint, the better you'll become. Don't be afraid to experiment, make mistakes, and learn from them. Think of each painting as a learning opportunity, even if it ends up looking like a cataclysmic explosion of color.
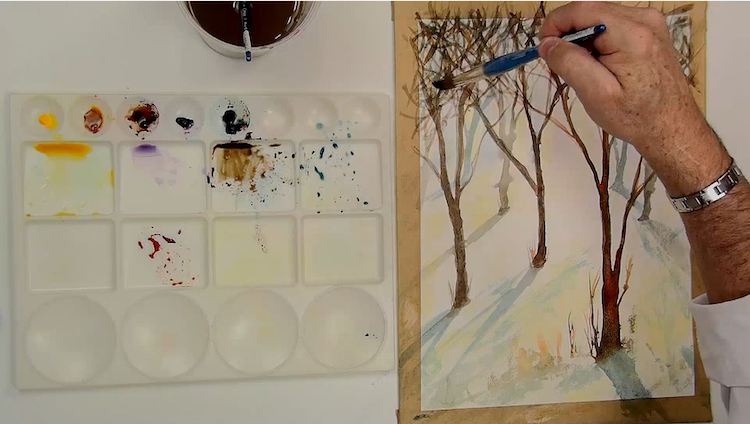
- Use a Palette: A palette will help you keep your paints organized and prevent them from drying out. You can use a traditional palette, a ceramic plate, or even a plastic lid. Just make sure it's clean and non-absorbent.
- Don't Be Afraid of Mistakes: Mistakes are inevitable, especially when you're first starting out. Don't let them discourage you. Instead, embrace them as learning opportunities. Sometimes, the best paintings come from unexpected accidents.
- Use Masking Fluid: Masking fluid is a liquid rubber that you can apply to your paper to protect certain areas from paint. This is perfect for creating sharp edges or reserving white areas. Just be sure to remove the masking fluid carefully once the paint is dry.
- Have Fun! Watercolor painting should be enjoyable. Don't put too much pressure on yourself to create a perfect masterpiece. Just relax, experiment, and let your creativity flow. After all, it’s just paint, paper, and a little bit of magic.
Final Thoughts: Embrace the Imperfection
Watercolor is a beautiful and versatile medium, but it's also a bit unpredictable. Don't be afraid to embrace the imperfections and let the paint do its thing. The beauty of watercolor lies in its fluidity and transparency, its ability to capture light and shadow, and its unique blend of control and chance. So grab your brushes, unleash your inner artist, and get ready to create something amazing… even if it's just a slightly blue cat. Bonne chance!


![[Aquarelle] Tutorel débutants](https://i0.wp.com/www.artiste-animalier.com/wp-content/uploads/2020/07/tuto-aquarelle.jpg?fit=1200%2C675&ssl=1)